How to put icon images in footer on Shopify ?
Usually, we add icons to our Shopify website footer to make our website more user-friendly, which improves our interaction with customers. Another reason is to enable our customers to access our social platform by clicking on our social media icons.
Also, we can add payment icons to build a relationship with our customers by letting them know that we accept payments in multiple ways. Therefore, our customers experience a mental click, realizing they have the flexibility to choose any payment option . and it also gives them trust to buy products from our website.In essence, it’s a trick to interact with your clients to give them transparent information.
Let's see, what are the ways to put icon images in a footer on Shopify?
Shopify allows us to add these features by default. We will see how we can set up icons using built-in features in Shopify.but you may want your own icon images in your Shopify footer to personalize your site, make it look unique from other Shopify websites.
Technically, we have two ways to put our icon images in the footer. One is the default theme option. Another way is to use a piece of code to customize our footer. Don’t worry, I showed both of the methods to put icon images in the footer on the Shopify website. Let’s start with the easy one.
Method 1 : Put Icon Images in Footer on Shopify using simple settings
- With every step, I added screenshots. Take a look at the screenshots for additional visual guidance.
| Step 1
Log in to your Shopify admin panel . Once you are there, click “Online Store“ from the left sidebar.
Online Store section will expand. once you see it click on “Themes“.
| Step 2
Click on “Customize“, and the theme editor will open.
| Step 3
Scroll down on the left sidebar , you can see “Footer”. Click on it
| Step 4
Now you can edit the footer . to add social media icons . Tick the Social media icons . scroll down and find Theme Settings.
| Step 5
Scroll down and Click on “Theme Settings” .You will notice input boxes for various social media accounts. Copy your social media profile link and paste it into the matching box
Then your social media icon logo will automatically appear on your footer. when someone clicks any of the social media platform icon now it will automatically redirect them to your social media platform
| Step 6
To add payment option icons You need to set up payment methods . those payment methods are added only those Icon will be shown on the footer.
Tick on “Show payment icons“
If your payment options are settled then you can see icons are visible now .
Once you are done with these, click Save. And you’re all set!
Method 2 : How to put icon images in footer shopify - customly
Customize the footer using code.
By customizing our Shopify footer, we can design our footer according to our needs. Shopify’s footer is quite similar for all Shopify users, but what if we want to personalize our site and want a unique design on our footer that is different from other websites? that represent our brand through your own design. We can customize our Shopify footer by using a piece of code. It is better if you have some code and design knowledge.
Let’s see how we can do that step by step:
| Step 1
Go to your Shopify admin panel and click “Online Store“ from the left sidebar.
when the Online Store section expands. Click on “Themes“
| Step 2
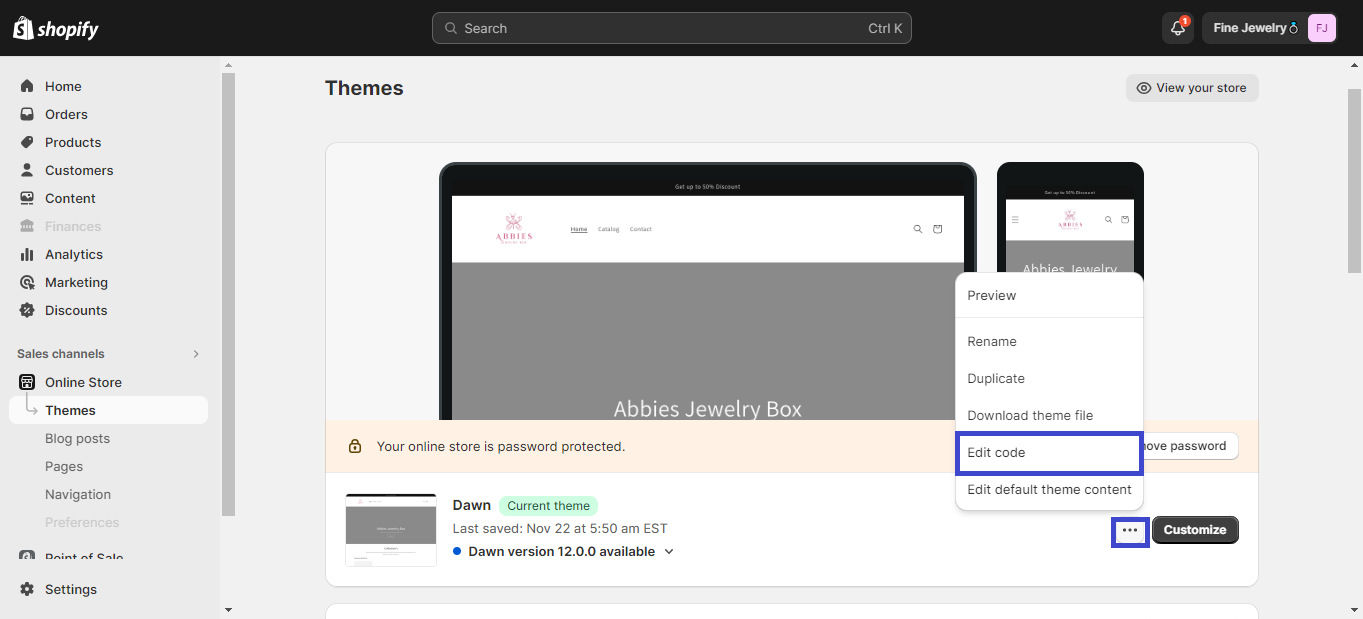
Click On the three-dot icon . and Click Edit code. Make sure to take a backup of your theme before making significant changes.


| Step 3
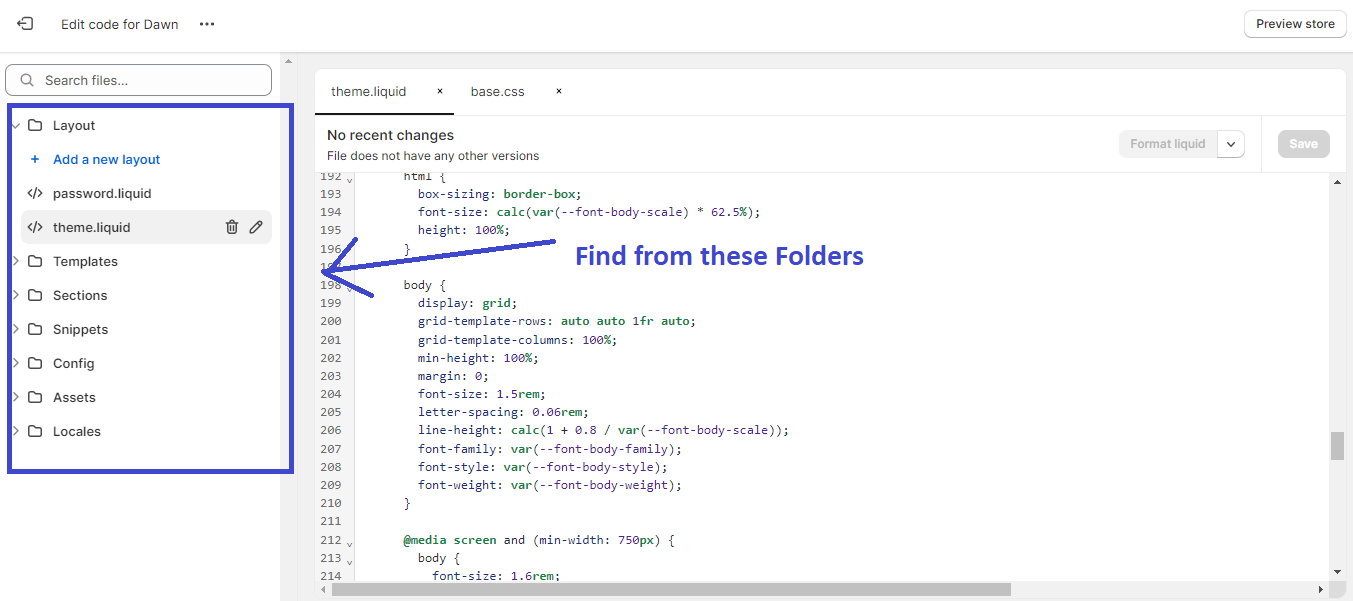
You will be navigated to the theme edit page . Look for the sections related to the footer. Common files include theme.liquid , footer.liquid or similarly named files.


File names can be different. It depends on your theme . once you get it . Now, you can design the footer according to your requirements.
| Step 4
Basic footer Design code. you can copy and paste it into your footer section.
Html and CSS Code :
<footer>
    <div class="footer-container">
            <div class="footer-section">
                <h4>Who We Are ?</h4>
                <p>Lorem ipsum dolor sit, amet consectetur adipisicing elit. Molestias ratione, blanditiis officiis officia voluptas qui autem consectetur reiciendis amet quasi, porro, debitis nobis fuga? Beatae ex atque veniam magni voluptatibus?</p>
            </div>
            <div class="footer-section">
            <h4>Contact Us</h4>
            <p>Your store address</p>
            <p>Email: your@email.com</p>
            <p>Phone: +0990200202</p>
            </div>


            <div class="footer-section">
                <h4>Quick Links</h4>
                <ul>
                <li><a href="/">Home</a></li>
                <li><a href="/collections/all">Shop</a></li>
                <li><a href="/pages/about-us">About Us</a></li>
                <li><a href="/pages/contact-us">Contact Us</a></li>
                </ul>
            </div>


            <div class="footer-section">
                <h4>Follow Us</h4>
                <ul>
                <li><a href="#" target="_blank">Facebook</a></li>
                <li><a href="#" target="_blank">Twitter</a></li>
                <li><a href="#" target="_blank">Instagram</a></li>
                </ul>
            </div>
    </div>


            <div class="copyright-section">
            <p>© {{ 'now' | date: '%Y' }} Your Store Name. All rights reserved.</p>
            </div>


</footer>


<!-- CSS Design -->


  <style>
    footer {
      background-color: #f4f4f4;
      padding: 20px 0;
    }


    .footer-container {
      display: flex;
      justify-content: space-between;
      max-width: 1200px;
      margin: 0 auto;
    }


    .footer-section {
      width: 22%;
    }


    h4 {
      font-size: 18px;
      margin-bottom: 10px;
    }


    ul {
      list-style: none;
      padding: 0;
      margin: 0;
    }


    li {
      margin-bottom: 8px;
    }


    a {
      text-decoration: none;
      color: #333;
    }


    .copyright-section {
      text-align: center;
      margin-top: 20px;
      border-top: 1px solid #ddd;
    }
</style>Result :


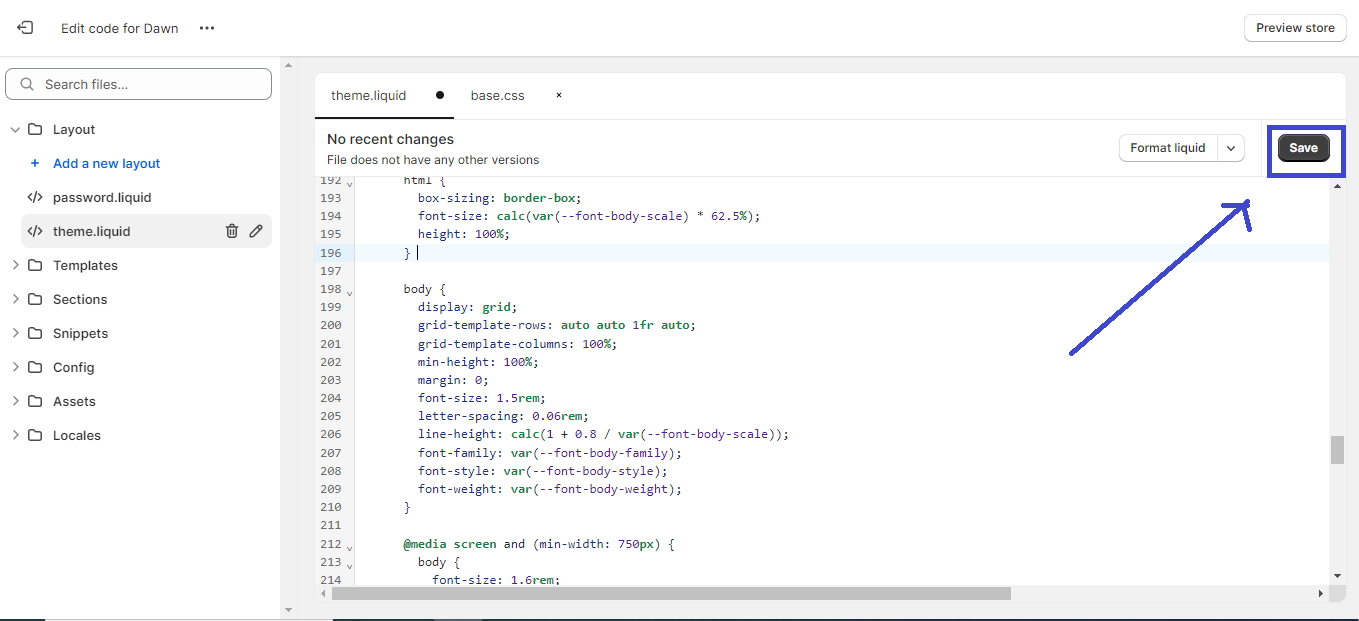
Once you have done Click on Save button .
